


A pantry is one of those spaces that can truly transform how your home functions, and ours was in desperate need of a makeover. When we moved in, it was just an empty space, and for the past year, we relied on temporary metal shelving to store everything. After months of dreaming and planning, I’m so excited to share the reveal of our brand-new pantry! This renovation not only brought beauty and organization to our home but also made our daily routine so much easier. Whether you’re looking for inspiration or tackling your own pantry project, I hope this post sparks some ideas for your space!

Watch a full tour of the space on my Youtube channel here:

Dream Pantry Makeover: How We Turned a Cluttered Space into Our Dream Butlers Pantry
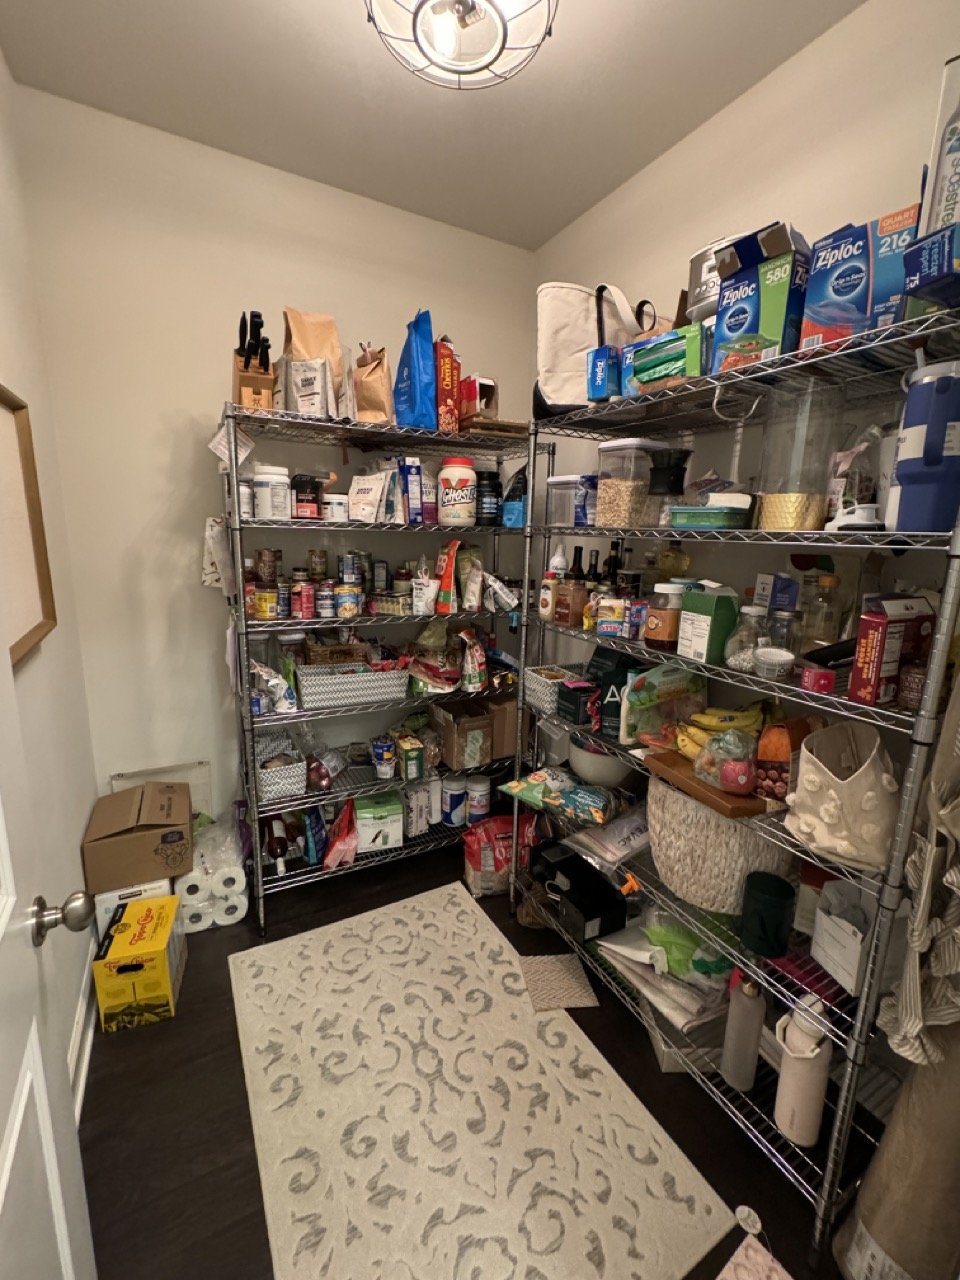
To truly get a feel for how much this space has transformed, lets first take a look at our pantry before we started the renovation. When we moved into our house, it was just an empty 86×73 inch room. We were gifted 2 metal shelves for storage, and while it served it’s purpose, the setup was far from functional or aesthetically pleasing. The lack of proper organization made it a challenge to keep track of what we had on hand, often leading to overbuying or forgetting essential items during grocery trips. It was clear this space had the potential to be so much more, and I couldn’t wait to transform it into the organized, Pinterest-worthy butler’s pantry I’d been dreaming of.

How to Plan a Functional and Stylish Butler’s Pantry
Whenever I start a home project, the first thing I like to do is create a note on my phone with any ideas, wishlists, and dimensions. Then I head over to Pinterest (here is my home folder if you want to browse it) and start a new board so I can save any design ideas that I’m drawn to. I think it’s important to spend some time with this process, so you can really get an idea of not only what you want the space to look like, but most importantly how you want it to function. I brainstormed ideas for about 5-6 months and got a few quotes before I started the actual pantry renovation.
key features I wanted in our pantry design
After saving pins for a few months, it was clear that I was drawn to similar design details: vertical shiplap backsplash, a mix of open and closed storage, and a specific curve detail I wanted for the open shelving. Here are some other must-haves I wanted for this space:
- L shaped countertop
- wood-toned open shelving for decor
- closed food storage to hide the clutter
- outlets for appliances
- mix of drawers and cabinets
Pantry Dimensions:
86×73 inches
Curious about some other spaces we’ve updated? Check out our mudroom before and after, which is adjacent to this pantry space!

Our Mudroom Makeover
I’m thrilled to share our first home project in the new house: our mudroom makeover. We moved into this home in February and immediately started updating the mudroom. This room serves as our everyday entry, and we use it multiple..
Read the PostPantry Before and After Reveal
The project took about 4 months from start to finish, with some delay on my end during July and August due to work (hi NSALE) and travel. From the beginning, I knew I wanted to incorporate this wallpaper into the design, and I’m so happy with how it transformed the space! I wanted to open up the room as much as possible, so we removed the pantry door and updated the trim between the mudroom and pantry. I wanted the spaces to feel cohesive, so I also added the wallpaper to the mudroom as well.


It’s a hard angle to photograph, but if you’re wondering where most of the food is stored, it’s in a cabinet to the right. There’s 4 tall shelves for most of our food, plus 3 small drawers on the bottom for Josies’ snacks, and 4 cubbies at the top of wine! Above the cabinet is a large upper cabinet that is actually empty right now, but will eventually store excess decor like vases or other things we don’t use all the time.
One feature that gave us a little trouble was the slide-in cabinet door. I wanted to be able to slide the left cabinet door in so it wouldn’t be in our way when unloading groceries. I’m glad we did the feature, but it can be a little tricky to easily slide in and out.

Any Design regrets or things I wish I did differently?
Of course, there are a few! The first one being there was originally a backsplash piece on the left side wall. It just looked awkward and unnecessary to me, so I had the painters remove it. Thankfully it was an easy fix!
The second thing I wish I could change is adding a second switch for the sconce. We just had it hardwired into the overhead light so it automatically turns on when we walk in, but in hindsight, I wish I could also have it on at night as accent lighting. I think there are still some workarounds for this if I want to change it.
Pantry Sources:
Walls and shelves: Sherwin Williams Snowbound (we used a mix of matte (trim and ceiling), eggshell (walls) and semi-gloss (cabinets)
Cabinet paint color: Sherwin Williams Pediment in semi-gloss for durability
Hardware: bin pulls, knobs, cabinet lock, pulls, gallery rails all in unlaquered brass (I love the added character as it patinas)
Wallpaper: Summer Harvest in Silver
Sconce: Visual Comfort
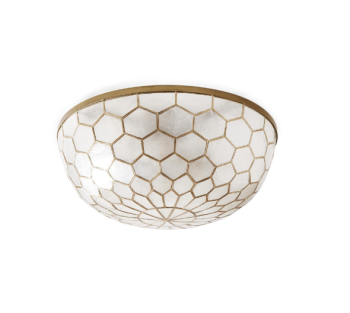
Flush mount: Visual Comfort
Wood shelves: custom but you can order custom here
Glass Jars: Available at Amazon and Walmart
Glass Jar labels: Etsy
Checkered jars: MacKenzie Childs
scalloped basket: Amazon
Rug: Wayfair


Leave a comment